A Graphical Tutorial
A Graphical Tutorial
Note: If you do not have a current Java runtime environment installed, you will see a blank gray window in place of the applet. If this happens, make sure you have the latest version of the Java Plugin installed. The first time you run the program, a window might appear asking if you wish to trust the signed applet. You must chose to trust the applet. The applet needs certain privileges to print and save files on your computer. If you do not grant the privileges to the applet, it will not be able to save, open, or print on your computer.
If you mistakenly click another edge, just click a second time on it to deselect it. The Condense Edges macro allows you to find a sequence of edges which is repeated, and replace each occurrence of the sequence with a single new edge. Click the button "condense string". This will cause the selected sequences to be replaced with a new edge "e". The letter "e" is chosen since it is the first letter that currently is not in use.
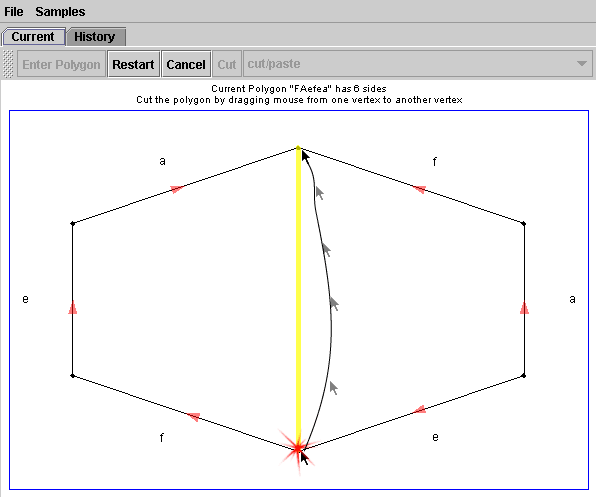
Input a new polygon into the applet by clicking "Restart" and "Enter Polygon". For this example, we use the polygon "FAefea". Click the "cut" button or select "Cut/Paste" from the Macros menu. Then click on a vertex and drag the mouse to a non-adjacent vertex. Release the mouse when the yellow line is drawn where you want to cut the polygon apart. Here I cut the polygon vertically from the top vertex to the bottom one.
Beginning of Tutorial
Click on the images below for screenshots of the various steps
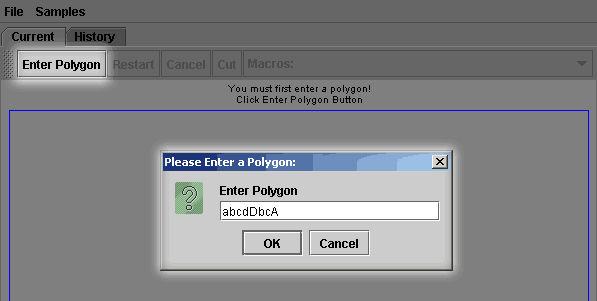
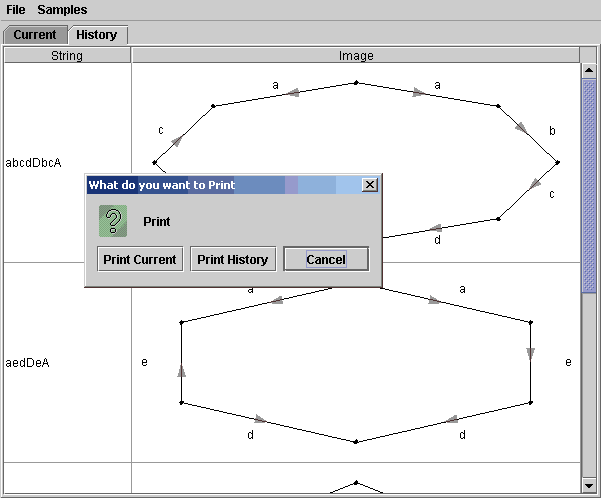
Enter a Polygon as a string by clicking the "Enter Polygon" button at the left end of the toolbar. For example, enter "abcdDbcA".
An 8 sided polygon should now appear in the main portion of the window.
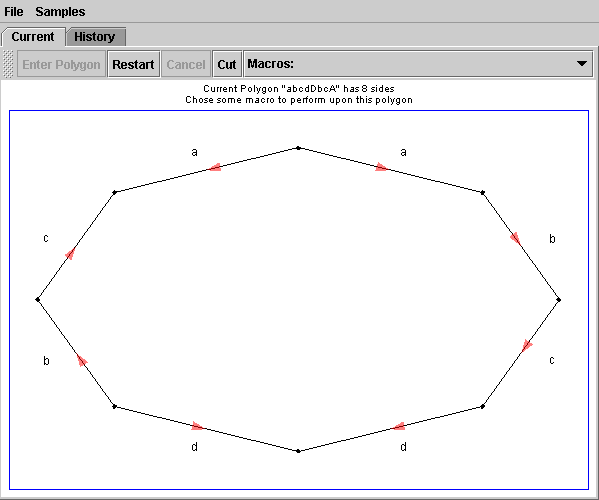
From this point, you can chose any of the macros from the "Macros:" menu in the toolbar or click "restart" to start over. You can open a saved file or print the polygon by using the appropriate actions in the "file" menu. The "History" tab will display a series of all the steps you have performed in trying to simplify the polygon. The "Cut" button in the toolbar is there for easy access, as it is a common macro to be used.
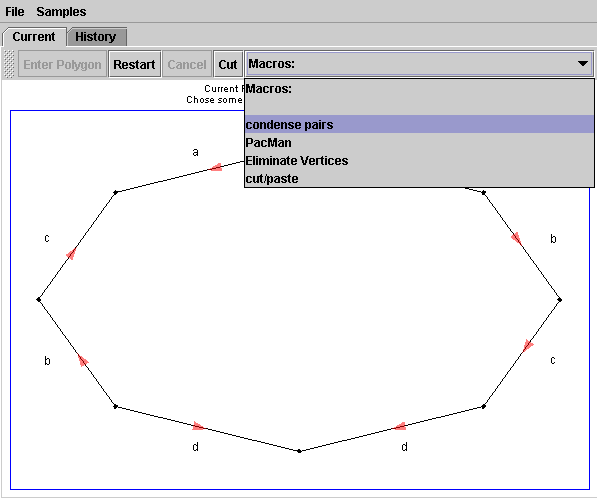
Lets try the "Condense Edges" macro by selecting it from the "Macros:" menu.
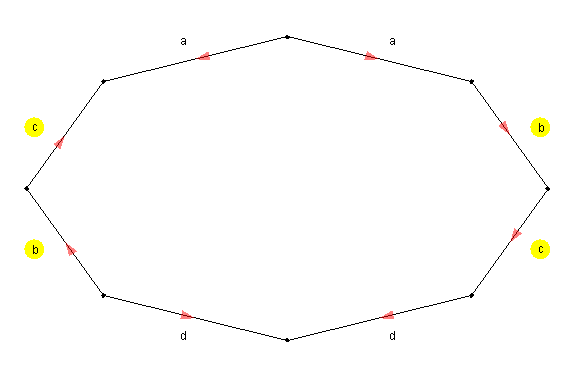
Now click on one of the "b" edges, a yellow circle should appear behind the letter "b". If it doesn't appear, try clicking again. Now select the edge "c" in the same manner.
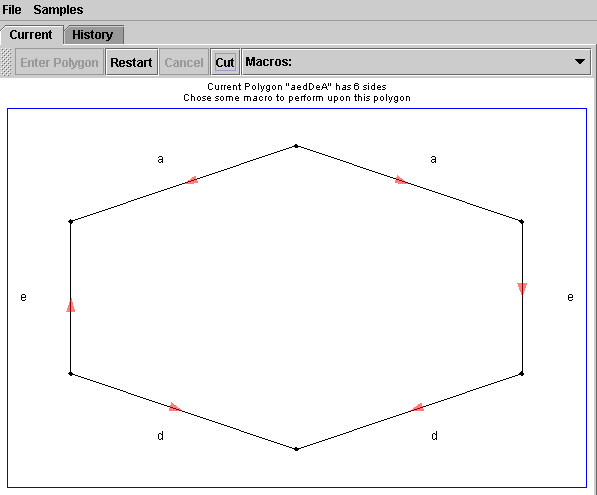
Now you should see a 6 sided polygon "aedDeA". Notice that when reading the edges in a clockwise direction from the top center vertex, we see an "a", followed by a "e", followed by a "d", all pointing in the same clockwise direction. However next is a backwards "d", which is written as a capital letter "D" in the string of letters describing the planar diagram.
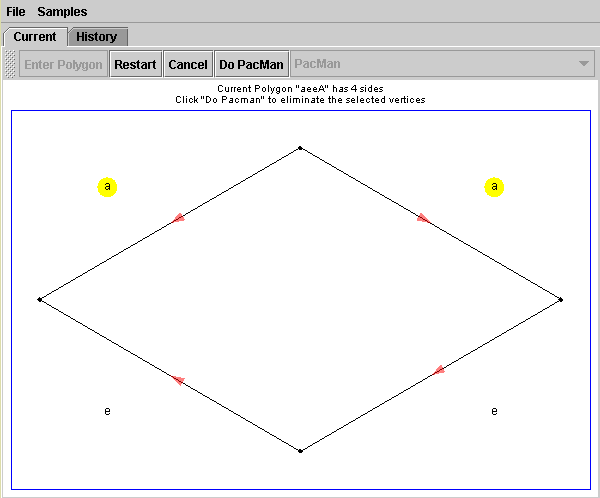
If you notice that there are two adjacent edges with the same name, but with opposite directions, you can use the PacMan macro to eliminate that pair of edges. Just select the "PacMan" macro from the menu, and click on an edge which is adjacent to its partner. For this example, click on either of the "d" edges. They should become highlighted, and you can click the "do PacMan" button to eliminate these two edges. If you mistakenly click on the wrong edge, just click on the correct edge before clicking the "do PacMan" button.

Now the polygon has 2 pairs of edges.
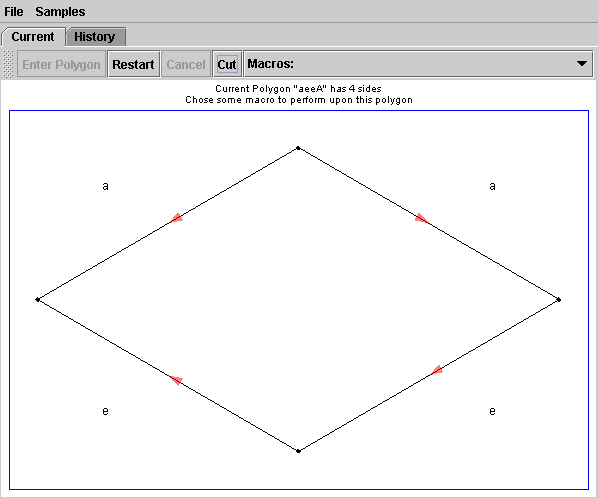
Apply the PacMan method to eliminate the two edges labeled "a", as we did above when eliminating the "d" edges.
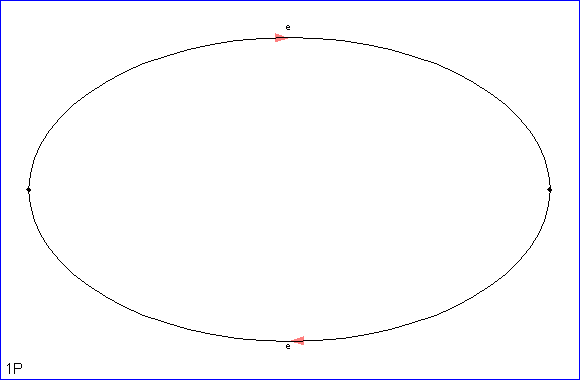
Now the figure is reduced to a 2-sided polygon, which is recognizable as the simplest form for the projective plane. Notice in the bottom left corner, "1P" is displayed. (As long as all vertices are the same, the polygon is correctly identified in the bottom left corner)
The Meanings of the Identifications Used
1P
=
a projective plane
P2
2P
=
The connected sum of 2 Projective Planes
2P2=P2#P2
...
=
...
1T
=
A torus
T2
2T
=
The connected sum of 2 tori, or
a 2-handled torus, or
2T2=T2#T2
3T
=
The connected sum of 3 tori, or
a 3-handled torus, or
3T2=T2#T2#T2
...
=
...
Cutting and Pasting
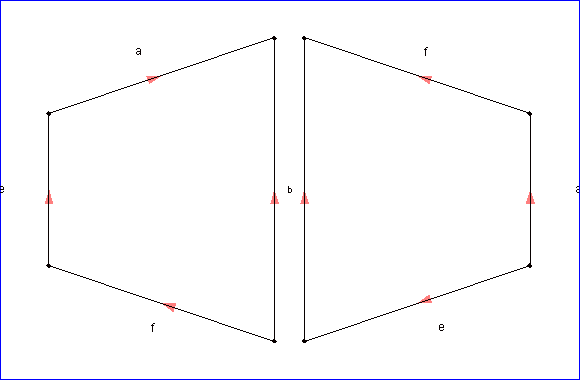
Once you have cut the polygon, it will become two polygons with a new pair of edges along the cut.
Now we will glue the two polygons back together using a pair of edges. Click on the edge you wish to glue back together. For this example, click on one of the edge's labeled "F".
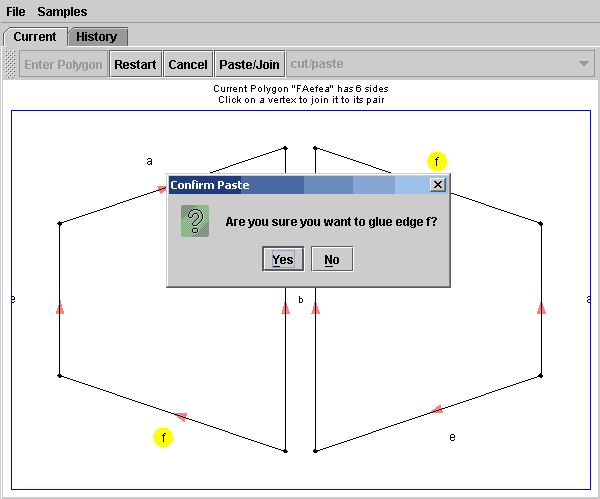
Now the polygons have been rejoined, but the edge "F" has been eliminated. When pasting, only edges that are not on the same polygon may be joined, so you must click on an edge whose partner is on the other cut apart polygon.
Eliminating Vertices
Start with a new polygon "abCdeBADce".
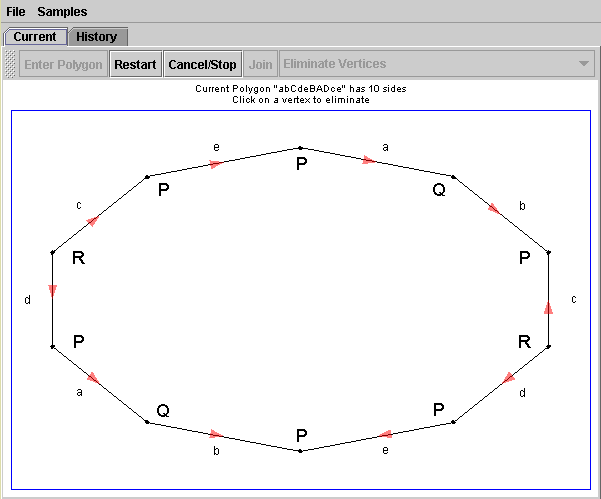
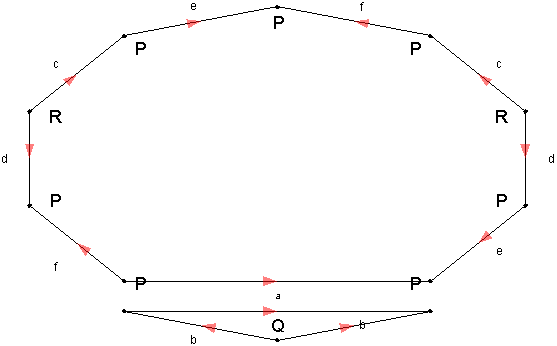
Select "eliminate vertices" from the macros menu. The vertices will all be labeled, and at this point, we will eliminate any vertex that is not labeled "P". We could have chosen another vertex, but we must cut and paste the polygon until exactly one vertex remains. Start by clicking on the upper right corner vertex labeled "Q" between edges "a" and "b".
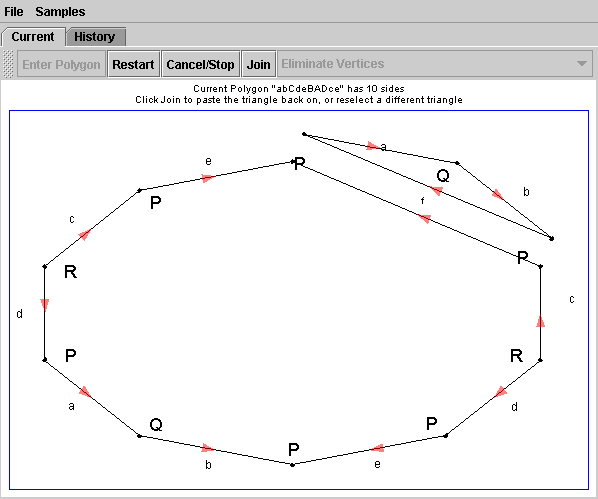
Next we want to glue the triangle back onto the remaining polygon along the edge labeled "a". To do so, click on either edge labeled "a", and then confirm the gluing operation by clicking "ok"

Now the corresponding planar diagram should be displayed, "FCdeBbfDce"
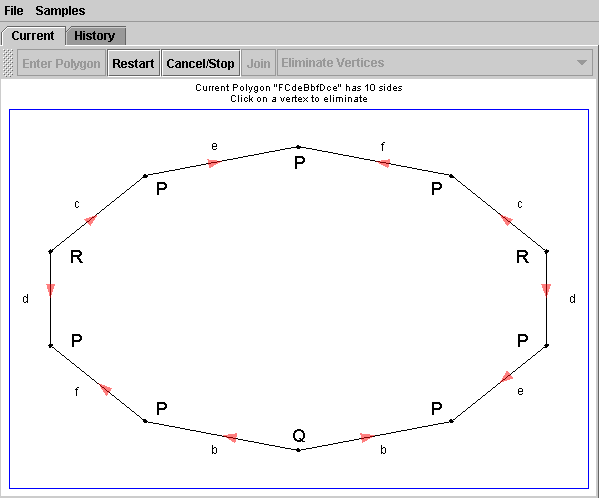
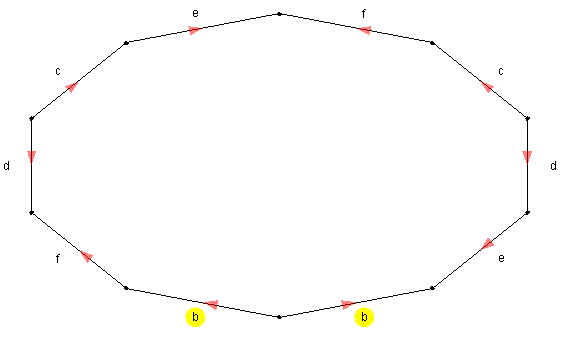
Now lets notice the pair of adjacent edges labeled "b" which happen to be in opposing directions to each other. This means we can use the "pac-man" method to fold these edges together and eliminate them both. To do so, chose pac-man from the menu, and click on one of the edges labeled "b". Then confirm the change by clicking the button at the top.

Eliminating Vertices
You may print out the planar diagram by choosing print from the applet's file menu. You may then chose to print just the current simplified planar diagram("print current") or a series of all steps in producing the current polygon("print history").
©2003 Isaac Dooley